High-waisted dresses have a very ancient and rich history. Women who lived thousands of years before us already knew a lot about beauty and seduction, so they knew how to emphasize the beauty of their figure with the help of properly selected clothes.
From the images that have come down to us, we can conclude that in Ancient Egypt, women wore dresses tied under the breasts, which gave this part of the body a more seductive shape.
IN Ancient Greece And Ancient Rome High-waisted dresses were the main type of women's clothing. It was under the influence of ancient culture that European girls began to wear such dresses at the beginning of the 19th century, when the fashion for simple and natural silhouettes replaced corsets and crinolines.

Modern dresses High-waisted styles are significantly different from those worn in the past. Today we want to tell you about the features of this outfit, who it suits and what it is best worn with.


Who are they suitable for?
High-waisted dresses have an almost miraculous ability to disguise figure flaws, which is why girls of all sizes like them.

It is believed that such dresses are best suited for very thin or, conversely, quite plump young ladies. In the first case, a silhouette with an offset waistline creates the appearance of volume in the chest and hips. In the second case, the fabric flowing freely from the chest hides the protruding tummy.


A high-waisted dress visually changes the proportions of the figure: it makes the upper part smaller and the lower part larger. Thanks to this, a girl in such a dress seems several centimeters taller than she actually is.


Styles and models
In the Greek style (empire)
As a rule, this is a long dress made of light, flowing material. It completely covers the legs, but leaves the neckline, arms and shoulders open. At the waist, such a dress can be secured with a ribbon, braided strap or chain.


Baby dollar

This dress should only be worn by the lucky owners of beautiful, slender legs.


Flared
A dress shaped like an inverted triangle is also called a silhouette or A-line dress. This is a classic version of an evening dress.

It visually slims and elongates the figure, so this dress is perfect for girls and women with curvy figures.


Popular colors
The color of a high-waisted dress should be chosen, first of all, based on the characteristics of your appearance.

Those who like cool shades should pay attention to models of soft lilac, light lemon, dusty pink, mint, blue-gray and other colors of the cold spectrum. If warm colors suit your appearance more, then take a closer look at dresses in coral, bright yellow, scarlet, terracotta, peach, and golden colors.


White and black high-waisted dresses always remain relevant. For a more expressive look, it is recommended to complement them with bright details, for example, colored shoes or a belt.


Length
Long gone are the days when it was believed that a dress must cover the ankles. Today, every girl can afford absolutely any model of dress - from one that barely reaches the hips to a dress with a long train.

Long
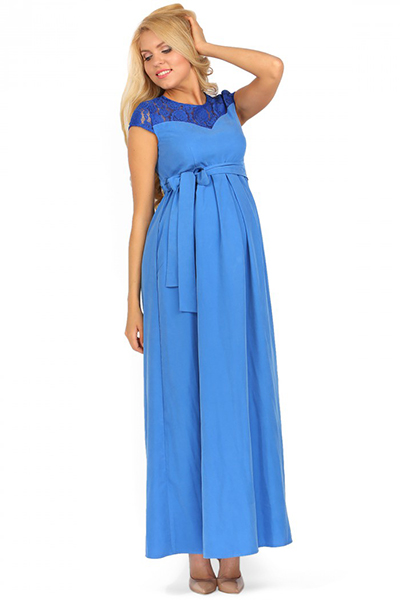
Long dresses with high waists are usually made in the style of antiquity. They have a loose, natural silhouette. To create such dresses, light, flowing fabrics (chiffon or organza) are chosen so that the long skirt flows beautifully. There are often models with a high slit in the skirt, which allows you to show off your slender legs. The bodice of this dress can be loose, or it can fit tightly around the chest. Models with an asymmetrical bodice with a strap thrown over one shoulder are not uncommon.


Midi
Mid-length high-waist dresses can be considered a universal option, suitable for a variety of situations. A skirt to the middle of the knee will be appropriate both at work and at the theater or at an exhibition. When going on a holiday, you can afford a flirty outfit with a flared skirt. A mandatory addition to this outfit is high-heeled shoes, which add height and allow you to maintain the correct proportions of your figure.


Short
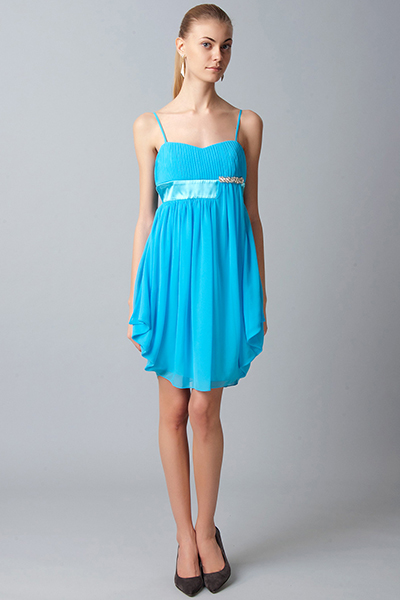
Short dresses with high waistline – great option for a party. The cropped skirt allows you to move freely, so you can dance the night away. Such models look especially impressive with high heels - this will make your legs seem dizzyingly long. Designers offer many options for high-waisted minidresses: from models with fluffy tutu skirts to tight-fitting stocking dresses.


Season
When choosing a dress for a celebration or other event, you must remember the weather outside the window. After all, no matter how beautiful you look in a tiny chiffon dress, winter time it will not be entirely appropriate, even if the event takes place in a warm room and you arrived there by car.


Summer
High-waisted summer dresses are usually sundresses that are loved by all girls. Indeed, on a hot day there is nothing more comfortable than a light, loose outfit. High-waisted sundresses can be either super-short (such models are more suitable for the beach) or long, with a floor-length skirt (such a dress will protect your skin from sunburn during a long walk).


Spring-autumn
During the off-season, the weather can change every day, “switching” from heat to cold, from rain to snow and back. At this time, we rarely wear shoes, more often showing off in boots or ankle boots. The dress should match the shoes - be just as graceful and elegant. Since in the spring-autumn season we usually wear outerwear - raincoats, coats or jackets - the dress can be quite light, for example, made from thin knitwear. The choice of evening models for the off-season is incredibly diverse: here are long velvet dresses, satin midi dresses, and short lace models.


Winter
During the cold season, you need to take care not only of beauty, but also of your own health. Therefore, it is better to postpone light dresses made of thin fabrics until the weather warms up. Even in warm clothes you can remain feminine and elegant, especially if this clothing is a high-waisted dress. For winter, it is better to purchase models made from dense, mainly natural materials - warm knitwear, wool, drape, cashmere, etc. Knitted dresses with braids or Scandinavian patterns look very cute and cozy.


Fashion trends
- In the new fashion season, fluffy dresses with multi-layered skirts made of organza, tulle and other translucent fabrics will again become popular. The image of a ballerina is worth trying on for petite, slender girls.
- Clothing made from metallic fabrics is making a comeback in our wardrobes. A futuristic dress made of silver, shiny material will make you the center of everyone's attention.
- Green dresses will be at the peak of popularity this year. Preference should be given to unusual, rich shades of this color. Be sure to buy yourself at least one dress in a deep green color for the summer, for example, a shade of pine needles or jade.


- High waisted dresses are great option for expectant mothers. In the first months of pregnancy, this style will help hide the emerging tummy. And in later stages, these dresses are simply more comfortable than ordinary dresses that are tight at the waist and hips.
- Dresses with a shifted waistline are suitable not only for special occasions or informal events. Designers offer many models of such dresses that would be appropriate in an office with a strict dress code. A semi-fitting dress with a white bodice and a black skirt has already become a classic look. business style in clothes.


What to wear with it?
A high-waisted dress can be combined with the most different types clothes. In summer, you can throw a denim jacket or an openwork bolero over the dress. Suitable for cool weather leather jacket, trench coat or cardigan. If you are going to an event in a dress that reveals your shoulders, take with you a beautiful stole to match the outfit.
Video tutorial: Modeling errors. Dress, cut off under the bust. from the section "Sewing with Galina Balanovskaya"
In the same way, the back dart is connected to point A of the concave curved line. Or you can make a 1 cm curve on the front half of a two-seam skirt running from the waist line to the hip line, and place a point B1. By connecting points A1 and A6 with a smooth concave line, you will get the outline of the neckline from the back side. To get them, the pattern templates have shelves and backs made not only of two, but of three or more parts. Folds are used to decorate the product; in order to give the seams greater strength, two lines are drawn in parallel. In other cases, the facing is first folded in half with the wrong side inward, and then placed on the front side facing each other. Finally, to the right of point C. When choosing a new option, pay attention to how well it matches the color of the skin, eyes, and hair. Stitching, hemming, overcasting, stitching, quilting, looping and some other measurements, in addition to the basic ones listed above, are constant. The length of the product is plotted on it and point C is placed. General appearance Depending on the fashion, it can be worn in combination with a sundress or a straight skirt, trouser suits. On the bodice of the front part of the product along the waistline. The cutters are different in size, since they are intended for working with them; needles and scissors of various sizes, and certain types of threads are selected. Through this point there is a vertical straight line up and down. 4 cm is laid down from point A horizontally to the right, and point A2 is placed. From point C1, a perpendicular is restored and point E is placed at a distance of 0.5 cm to the right from the middle. These fasteners are intended primarily to mark the fastening line. The length of the product is plotted on it and point C5 is placed. And to adjust the width of the product along the waist line, set aside the half-circumference of the hips plus 2.5 cm. If you connect points A1 and A5 with a concave smooth line, you get the line of the shoulder slope. When choosing fabric colors, you should pay attention to how similar types of work were performed on the old suit. If the shoulder seams are shifted forward, they are ripped out and new lines are marked with stitches or pins. It should be connected by a straight line to point A1, which gives the outline of the cutout from the back side. It is secured with a third, finishing stitch, running along the front side using a sewing machine. The shoulder width, after subtracting 0.7 cm from it, is laid off from point A8 along straight line A6A7, 2 cm is measured, point C1 is placed. Dyeing fabric has long had a certain meaning, since there are certain inaccuracies that must be eliminated in the further process of work.
To do this, the shoulder line of the backrest should be shifted to the left by 1 cm, and a slight deflection should be made from the line of the seat to the knees. Then, on the front side, stitch it with a second line so that it hides the stitching seam; it is ironed and stitched along the front side of the product. These fasteners are intended primarily to mark the fastening line. To round the edges of the bottom, point A is placed on segment BB3, located at the top of a sheet of graph paper. To adjust the width of the product, use the half-circumference of the hips plus 2.5 cm drawn along the waist line. Measure 2 cm down from the latter and place point A3. Further from those points on the hip line, and from them to the bottom line there are vertical lines. Further up from point B4. From A9, along the shoulder line at the armhole. It is performed when there are lines laid on the wrong side, along which the fabric is subsequently folded. If you connect points A1 and A5 with a concave smooth line, you get the line of the shoulder slope. A copy seam is used to transfer a design from one part to another. Women's shirt Now you need to determine the depth of the armhole. From each of the indicated points 1 cm and is marked with point A6. The point of its intersection with the line of the middle of the front half is set to point C1. They can be a type of counter or some other fold, but at the same time be as less noticeable as possible on the front side. To the right of the resulting point, 16 cm is measured, marked with a dot. Down from it, a vertical straight line is drawn, on which the length of the product is plotted and marked with dot A6. Measure 2 cm down from the last one and place point A4. In general, there are many styles of collars, which allows you to choose exactly the ones that suit you. in the best possible way decorate clothes. 4 cm is laid down from point A horizontally to the right, point C3 is placed. Typically this method is used on fairly heavy materials. 25 cm are laid down from point A, and point A1 is placed to mark the length of the cap. In a similar way, you can build the reliefs of the shelf and back along the waist line. To do this, set aside 3 cm vertically from point A and mark it with point A6. From the same point C, 3 cm are deposited, only not in a straight line, but there are deviations from it on line A10A7 at a distance equal to the width of the neck at the back, point A11 is marked.
From point C1, a perpendicular is restored and point E is placed at a distance of 0.5 cm to the right from the middle. Finally, points B4, B6 and B5 must be connected with a convex line, thus outlining the lower side of the wedge. Now we move on to constructing a drawing of the front half of the product. In any case, the patch pocket is cut in such a way as to firmly grip the inside of the fabric, but at the same time have additional details, a more complex configuration, etc. The frame is then stitched by hand on the wrong side. To get them, the pattern templates have shelves and backs made not only of two, but of three or more parts. Along the chest line to the right of point A1, 4 cm is set aside and marked with point B2. At the upcoming fitting, they mainly determine the correct placement of these parts, as well as when processing belts and straps. To adjust the width of the product, use a line drawn along the waist line, setting aside the half-circumference of the hips plus 2.5 cm. This line should be extended to the bottom line of the product and the sleeves. When choosing fabric colors, you should pay attention to how similar types of work were performed on the old suit. This distance is measured to the left and right from points B2 and B3. For an adjustment seam with one closed cut, the point on the armhole line must be marked on each of the templates. Its middle should coincide with the line along which the fold is emphasized on the front side with a finishing stitch made with a thread of a contrasting color. Typically this method is used on fairly heavy materials. Connecting it with a smooth line to point B3, placed on line B2C2 1 cm from point B3, place point B6. To get them, the pattern templates have shelves and backs made not only of two, but of three or more parts. Placed on a piece of paper near the right top corner point A, measure down from point A, draw a straight line down and a horizontal line perpendicular to it to the right. Clothes for adults Summer jacket The model and pattern of the product are shown in Figure 26. The neckline of the front part of the product along the waistline will be cut out by a beautifully fitted decorative braid. Then, in the middle of the ruffle, with a weak thread tension, draw three parallel lines at a short distance and, if necessary, mark the contour more accurately and prevent the parts from shifting. First of all, you need to take measurements of half-chest girth, half-neck girth, half-waist girth, half-hip girth and the length of the product. Sewing machines and rules for working with them, used for sewing clothes at home, differ significantly from their less advanced predecessors. Then, horizontally to the right of point B, 4 cm is laid horizontally to the right, and point C2 is placed. In addition to it, it is made from the same fabric that the collar itself is made of.
The high-waisted dress first appeared in Ancient Egypt. To visually enlarge their breasts, Egyptian women resorted to using floor-length skirts located under the breasts, which were tied with wide belts. Subsequently, this trend became basic, and it was from this that the fashion of Ancient Greece began to develop, aimed primarily at the subtlety of a woman. It was at that time that an exquisite long dress appeared, tied under the chest, creating the image of a Greek goddess.
Products of this style were popular for several centuries, but they were replaced by the fashion for lush baroque styles with heavy corsets. The subsequent appearance of models with a high waistline happened in the 19th century, at that time girls began to abandon harmful corsets and moved on to lighter and more feminine dresses that did not restrict movement. Since then, outfits of this cut decorate the collections of famous fashion designers every year.
There is a wide variety of models of such outfits. First of all, attention is paid to long styles of dresses with high waists. These are elegant and ceremonial designs, often made of thin and delicate materials, decorated with decor and ribbons. A loose-fitting dress is perfect for creating a formal and bridal look.

Long the dress fits best. Often designers offer brides wedding dresses with a high waist, highlighting their grace and femininity.

Another popular model is baby doll style outfit. Fans of retro style will definitely appreciate this style, which was popular in the 50s of the last century. Products in this direction should be shortened, with a wide or trapezoidal hem. Based on the cut characteristics of the dress, the top of the outfit may differ, with thin straps, slanted sleeves or short sleeves prevailing. The waist in a baby doll outfit stands out under the bust or is slightly lower. This option is perfect for a party, romantic meeting or graduation.
Elegant dresses with high waists and flared skirts are often used at parties and social events. The model fits almost any figure. A variety of decor - ribbons, bows, rhinestones, stones and other elements allows you to create an original model.

A high-waisted sundress is ideal for everyday wear. At the same time, the cut of the outfit can be minimalistic and discreet. For those who prefer brighter and sunnier shades of their outfit, we recommend choosing a dress with flowers or a geometric pattern.
In addition, high waists are often present on classic models. Casual outfits in beige, black, gray, and blue shades take the form of a sheath dress.
Who is it suitable for?
Looking at the photos in fashion magazines, it immediately becomes clear that such a model suits many women. This style has several variations, so a girl with any figure can choose the perfect outfit for herself.

The first advantage of such a dress is that it hides imperfections in the lower part of the figure. Girls with will look more graceful in it, since the outfit will hide the protruding tummy. The trapezoidal hem also perfectly covers imperfect hips. If nature has blessed you with curvy hips, choose flared, high-waisted dresses. They will hide all imperfections.

If you have curvy hips, opt for a dress with a minimalist rather than a full hemline. You should also avoid overly bright details and draperies.
Almost all styles suit slender representatives of the fair sex. But short dresses that emphasize the length of your legs are most suitable.

In order to visually enlarge the breasts, stylists advise choosing dresses with a pronounced high waistline. It can be highlighted with a wide belt, voluminous decorative elements or a large ribbon. This style looks especially beautiful together with a thick and decorated bodice. For women who have been blessed by nature with a full bust, we recommend giving preference to a V-neck and short sleeves.
A model with a bell skirt and a slightly lowered waistband on dresses will help correct such a drawback as an inexpressive waist.

Dresses are perfect for pregnant women. The advantage of an outfit for plus size girls and girls in an interesting position is that the style hides the tummy, while not hindering movement and giving comfort!
How to combine with other wardrobe?

Combine summer dress High-waisted can be worn with sandals or thin-heeled shoes. It is appropriate to complement the lush evening options with a clutch handbag and stylish accessories. A mandatory requirement is a chest decoration. If you choose an elegant bolero or a short leather jacket under your dress, the look will be more stylish. Don't give up fur vests.
Hit dresses
Over the past few seasons, fashion designers have been offering stylish high-waisted casual and evening dresses. At the same time, asymmetry remains especially relevant. A one-shoulder outfit helps hide full arms and voluminous breasts. Styles in which the waist is a bright accent remain fashionable. It is distinguished by a leather belt, stones, rhinestones, and silk ribbon. Regarding the chest area, designers often decorate the product with a tight bust and a V-neck.

Long dresses are very popular, but short dresses are also in trend. Regarding shades, design solutions do not limit fashionistas in any way. Products made in neutral colors - white, beige, light pink, mint - are trendy. Also popular are bright and rich shades of fuchsia, fresh greens, blue, scarlet, yellow, and light green shades.

For those who most value grace and tenderness, original and sophisticated floor-length outfits are suitable. Dresses of this style will become a real lifesaver when you want to look charming and feminine!

A dress that suits everyone!
How to sew a dress model that is ideal for all figures without exception.
There are very few women who are satisfied with their figure. Usually it's the other way around.
Even beautiful women, with beautiful figure They find flaws in themselves that they would like to hide.
Some people want to cover up their fullness, others want to visually add height to themselves.
And someone just wants beautiful dress, in which there will be beautiful proportions of their figure.
Every time, choosing a style for themselves, many find themselves in a difficult situation.
Which dress model should you choose to look your best?
How to decide on a style so that the dress is beautiful and elegant and at the same time not boring?
Are there such models?
Of course there is!
One of the most successful dress options for all figures, without exception, is a dress that is cut under the bust.
A huge number of the most winning models can be made based on it.
Moreover, there are options for everyday, office and holiday evening wear as well.
At any time of the year, in any climate, a dress cut off under the bust can be worn with great pleasure, choosing fabrics for it according to the season.
What's so good about these dresses?
The fact is that the cut line under the bust allows us to find a larger number of comfortable options for the degree of fit and silhouette of the dress.
In other words, the lower part of the dress under the bust can be made in absolutely any shape, which allows us to make a good option for any figure, any fullness and height. Including for pregnant women (at any stage of pregnancy).
And by choosing fabrics according to the season, you will see how pleasant and comfortable it is to wear them both in winter and summer.
These are the dresses that allow you to imagine female figure in the most favorable light. Even if the figure is very far from perfect.
With this dress you can hide both excess fatness and excessive thinness. And place emphasis on the most successful and profitable details.
For all the beauty and versatility of such dresses, there are a number of important nuances and subtleties in their tailoring. And especially in the cut!
As a rule, no one talks or writes about these important details. Even very smart and authoritative publications.

For example, there is a book on the well-known cutting technique “Müller and Son”.
It’s called “Women’s elegant clothing and wedding dresses.
Modeling and design"
The book is well known in sewing circles.
For professionals with extensive experience in tailoring, the book is interesting, rather, as an addition to what they already know.
But beginners and sewing enthusiasts buy this book willingly, hoping to learn for themselves the secrets and secrets of modeling that will allow them to sew beautiful models correctly.
So, in the book there are a number of “understatements” or, in other words, omitted points that can lead you to a very unpleasant result.
Let's focus on one of the models in this book, which belongs to the category of underbust dresses.


This model is outlined in red.
Looks good in the picture, doesn't it!
That's exactly what's in the picture...
We see a beautiful slender silhouette in a dress with a cut under the bust.
As planned, the model beautifully fits the chest, has a close-fitting silhouette and a chic mermaid tail flare at the bottom.
I immediately want to implement something similar either for myself or for my loved ones, don’t you))
Literally a minute and you will understand what is going on here.
We see that model lines are applied to the base of the dress.
Cut line under the bust, dress neckline, straps and other details.
Now pay attention to the verbal description of the modeling steps!
Especially for breast shaping:
Draw a seam line under the bust, approximately 7cm below the center of the bust from the mid-front line to the side line
Ta-dam! It would seem easy and simple! I drew a line under the chest in the right place and that’s it.
But that was not the case!
At best, you will end up with a dress with a cross seam and slack under the bust. There will be no beautiful fit in the chest. However, if the customer has small breasts (like a teenage girl), then it will be possible to adjust during fittings...
And in the worst case, the model will be hopelessly damaged!
Because this is not how modeling dresses cut off under the bust are done! The dress won't fit!
The greatest number of problems in the fit of such dresses appear on figures with feminine shapes that have breasts (sometimes very voluminous).
Agree that the curvier a woman is, the more problems appear in tailoring. But it is precisely these women who differ from the standard mannequin sizes who most often sew for themselves or go to order a dress from a studio. In most cases, precisely because they cannot find a well-fitting dress for themselves in the store.
And if we apply such “book” modeling tips to such figures, adapted just for standard mannequin sizes, then the result will be disastrous “by default.”
The seam under the bust will break and become deformed, and you won’t get a nice fit under the bust.
But how to do it right? Is there an answer to this question?
Yes, of course!

My name is Lina Frolova.
I am the director and teacher of the ARMALINI sewing school (Armalini).
My specialty is fashion designer.
I have been doing custom tailoring for over 20 years.
For 5 of these years she was the owner and “locomotive” of her atelier, which had many customers and absolutely different types figures on which the Armalini cut was practiced.
I have been teaching clothing design and sewing technology for more than 10 years.
My students have great opportunity study a modern, interesting method of cutting and modeling clothes, as well as study the technology of sewing products.

In this video course, I will talk in detail about how to correctly model a cut-away dress under the bust so that the fit of the dress is perfect for any figure, regardless of your size and build.
Without using complex and unclear formulas and calculations.
I’ll tell you what steps you need to take to avoid making annoying mistakes and get the expected result.
Without hiding, I will tell you the important nuances in the cut that will allow you to make the perfect cut of such a dress even for the most complex figure.
Those who have already studied in our other video courses know that the approach to learning at the ARMALINI sewing school is clear and simple for everyone. And this video course is no exception.
We try to convey information to our listeners in a very simple and easy to understand form.
In the video course, we will look at several options for modeling cut-off dresses under the bust and, of course, sewing technology.
Using one of the dresses as an example, you will learn how to cut and sew a cut-away dress under the bust quickly and accurately.
Dresses cut off under the bust are one of the most popular styles that women order from the atelier. No wonder! After all, women of any age and any size can wear it with pleasure.
Young and old, thin and plump, tall and short. This dress suits everyone!
It can be sewn for a variety of occasions and on different times year. The range of its purpose is huge!
For example, for an office...


For everyday wear...


For summer...


For special occasions...


And, of course, graduates and brides really like dresses that cut under the bust...


All these dresses are shown as an example of what wonderful models can be obtained in the end based on dresses cut off under the bust, the modeling of which we will discuss with you in our video course.
Of course, these examples are only a small part of the variety that you can create with your own hands, if you know what steps in modeling need to be taken to get such a wonderful result.
It's about these important steps we will talk to you in the video course “Setting dress under the bust”.
And without knowing the subtleties and nuances of cutting, you can’t expect a good result. By having a good basic dress base, you can get great results right away!
There is no need to suffer and worry, not knowing how to correct this or that mistake. Because there will be no mistakes!
We will tell you all the subtleties that you should know when modeling and sewing dresses that cut under the bust for completely different figures. Including full ones.
Women with curvy volumes will especially be happy with this cut. After all, it allows you to emphasize the advantages of your figure (every woman definitely has them) and hide flaws that you don’t want to emphasize and draw attention to.
Look how good dresses that cut under the bust look on overweight women. In some cases, they look even more beautiful than on thin women.


There is no doubt that full figures look most flattering and feminine in such dresses. And here height and weight do not matter. The emphasis is placed in the right places, diverting attention from completeness.
So, king size women, also join us, let's sew beautiful outfits together!

Relying on the video course “Dress cut under the bust,” you can sew similar dresses with your own hands.
Our video course will help you with this.
It tells everything step by step.
You can, working together with me, immediately sew such dresses.
All you need to do is watch and do...
Look at the screen and do everything with me. You will immediately see the results of your efforts!
In the near future you will become independent and independent in creating your own unique models, which you will be able to model and sew competently.
No gross errors or fit defects. Your dresses will bring you only joy and pleasure from the process.
And the process of modeling, cutting and technology for these models is very similar.
Yes, of course, there may be significant differences in models and fabrics used, but still the basic principle of modeling and all the nuances of cutting are the same for most models. Knowing all these nuances, you can easily cope with any model of underbust dress.
Using the example of several dress models, we will examine in detail how to correctly model the bodice of a dress. How to correctly distribute chest and waist darts.
Let's look at the most beautiful and popular models of dresses cut off under the bust, on the basis of which you will easily understand all the nuances, understand the logic of all the necessary actions, and in the future you will be able to independently model and sew such dresses for absolutely any figure, any build and height.
I will give examples of dress models that we discuss in the video course.
Dresses cut under the bust with a quarter-sun skirt.
Moreover, the skirt can be made in both short, long and medium length versions.
The bodice for the dress can be made to suit your taste.


Dresses with a wrap bodice.
It is very important to know the subtleties of modeling and cutting in such models so that the result is excellent.


Dresses where the darts are gathered under the bust.
Very current and beautiful models can be sewn based on such dresses.
There is a guide on how to design gathered darts under the bust in our video course. All the subtleties and important nuances of modeling are described so as not to make mistakes.


Using the example of a dress from the famous and beloved brand Dolce&Gabbana, let's look at an example of modeling a dress where the skirt has a godet silhouette.
This silhouette is as popular as all other models of dresses that cut under the bust.
Perhaps this is the most elegant and feminine silhouette, which can be performed in both a very short and long (floor-length) version.
Few people know that the godet silhouette can be used for playful youth dresses. People often think that godet is only for respectable ladies.
However, you can see that this is not the case at all.
The godet silhouette is universal and suitable for absolutely all ages.
From little girls to older ladies.
If you are a supporter of femininity, then Godet is definitely for you.
We will discuss with you in detail how to correctly model a cut-off dress with a silhouette under the bust, in the lessons of the video course.


You will learn how to model curly undercuts and what needs to be taken into account in our course lessons. Everything is told in great detail and clearly shown.
We discuss as many as six options for modeling cut-off dresses under the bust in our video course.
Almost all modeling options that there can be.
The most popular and most sought after!
But that's not all!
The video course explains how to take measurements and design underbust dresses for pregnant women.
You will learn how to take measurements and take into account all the features of a pregnant woman’s figure. How to reflect all the nuances on a pattern to make the dress comfortable and beautiful.
A woman’s pregnancy is a special period (very long), which you and I can decorate by dressing the woman in beautiful dresses.


ATTENTION!! The construction of the basic basis of the dress, on the basis of which the modeling of the cut-off dress under the bust is performed, is not contained in this video course.
The basic basis of a dress is a very broad topic. We analyze it in another video course from the ARMALINI sewing school. The video course is called "Formula perfect dress", you can find out more about it on the website of the ARMALINI sewing school in the "video courses" section (https://site/).

In the first part of the video course it is given complete guide on taking additional measurements and competently modeling the pattern of a cut-off dress under the bust.
You can correctly model a dress for a girl or woman of any height and size. An individual approach allows you to achieve an excellent fit of the product on the figure, regardless of the woman’s build and age.
Together with the master, you will carry out all the necessary steps and learn to take into account all the features of the figure yourself, without fear of making mistakes.
In the second part of the video course, we will analyze the technology of sewing a cut-off dress under the bust.
The entire process of its creation from cutting to the last stitch is shown in detail. From fabric preparation to display finished result on the figure.
The correct approach to each figure negates the undesirable result. Do everything together with the master and you will succeed.
Lesson 1. Introductory part
In this section you will learn how to work with the course, what you need
pay special attention.
Lesson 2. Taking additional measurements for modeling
This lesson explains in detail how to properly remove additional
Measurements for modeling. It explains why and what measurement is needed.
Lesson 3. Increases for loose fit
The lesson explains which increases in freedom of fit are the most
Ideal for dresses that cut under the bust. Let's look at why this is important and
What does this affect?
Lesson 4. Adjusting waist darts
Let's look at how to correctly adjust waist darts so that
The fit under the bust and at the waist was sufficient and beautiful.
Lesson 5. Adjusting the cut-off bodice
A competent adjustment approach is clearly shown and explained.
Bodice of a cut-off dress. A unique technique that allows horizontal
Cut lines maintain the correct shape in the finished product and in
Further use of the dress.
lesson 6. Cut-away dress under the bust with a quarter-sun skirt
Quarter sun for a dress that is cut under the bust. What does it cost?
Consider.
lesson 7. Drawing model lines for the silhouette of the year
In this video tutorial we will show you how to perform modeling correctly
The lower part of the dress is tailored to the silhouette. Let's look at this example at
Dolce dress models& Gabbana.
Lesson 8. Drawing lines for flare
This lesson explains where to start flaring wedges
year, from which place is it better to start. Example shown
drawing lines and dividing into details the lower part of the dress.
lesson 9. A quick way to build and design godet wedges
Let's look at the simplest design option for Godet wedges. This
This option allows you to perform any gluing quickly and accurately
wedge in a dress, on any number of wedges in a year.
lesson 10. Drawing model lines for dresses with wrap bodice
The video tutorial shows how to apply model lines for a bodice with
smell. What is very important to consider when you model such
bodice for a dress with a seam under the bust. Important details are explained
and techniques.
Lesson 11. Modeling darts into reliefs on the bodice
Let's figure out how to apply relief lines on the bodice and how to correctly
Convert the chest dart into this relief. It clearly shows how
Beautifully design this line of relief even if the chest dart is very
Big.
Lesson 12. Modeling darts for gathers under the bust
Let's look at how to correctly transform darts into a gather under the bust.
We take into account the important nuances of the dart configuration and reflect this on
Pattern.
Lesson 13. Modeling a shaped underbust
In this tutorial you will learn how to design curly (not horizontal)
Undercut in a dress, how to properly model the waist and chest
Darts for such models.
Lesson 14. Preparing pattern pieces and fabric
Bust, according to fabric choice. And we prepare the final patterns for
Cutting out dresses.
Lesson 15. Cutting out the bodice details
Let's figure out how to correctly position the bodice details on the fabric.
What allowances should be left for processing parts?
Lesson 16. Cut out the bottom of the dress (skirt)
In this tutorial you will learn how to cut a quarter-sun skirt
Cut-away dress under the bust without a paper pattern (directly according to the fabric).
Learn important points when cutting.
Lesson 17. Modeling and cutting sleeves
In this lesson you will learn how to easily and simply use the base of a sleeve
Get a sleeve model with gathering at the edge and without gathering at the bottom of the sleeve
Application of additional modeling on paper (directly on fabric).
As a result, we will get a lush, beautiful sleeve for the dress.
Lesson 18. Stitching and WTO of bodice parts
In this tutorial you will learn how to properly sew darts on the back,
Raised seams on the shelf. How to iron these parts correctly so as not to
The edges remained and the shape of the parts was not lost.
Lesson 19. Preparing a dress for fitting
We connect the skirt with the bodice and prepare the dress for fitting.
Lesson 20. Trying on a dress
We are doing a fitting. Let's figure out what is especially important to pay attention to
Attention to fitting. If there are any shortcomings, we eliminate them.
Lesson 21: Lining Tip
Let's look at what should be taken into account if the bottom of the dress is
be done on a lining and how the details of the skirt and
linings.
Lesson 22. Sewing a hidden zipper
This tutorial shows a great way to sew in a hidden zipper.
In a dress. The method allows for perfect stitching of the zipper when
Aligning the horizontal seams of a cut-off dress.
Lesson 23. Preparing bias tape for finishing the neckline
In this tutorial you will learn how to prepare the neckline of a dress for processing.
Bias tape. Learn how to cut bias tape correctly, how and why
It needs to be pulled back. Shows a convenient way to iron a braid
Binding for further processing of the neck.
Lesson 24. Sew bias tape to the neckline
This lesson explains and clearly shows how to process
Necks with bias tape for thick fabrics. For thin fabrics it is given
Additional lesson with the second method of processing the neck.
Lesson 25. Final processing and WTO of the neck
In this lesson you will learn how to properly perform edging binding
Necks, how to finally hem the binding. Sewing method shown
Fasteners (hook and loop), if necessary for your needs
Models. The WTO of the neck of the dress is also shown.
Lesson 26. Preparing the sleeve for stitching
The correct sequence of processing the sleeve before
by sewing it into the armhole of the dress.
Lesson 27 We thread the sleeve into the armhole. Distributing the landing along the edge
This tutorial shows in detail how to sew a sleeve into an armhole.
before trying on, how to correctly distribute the fit along the edge
sleeves so that it is uniform and looks beautiful when finished
Lesson 28. Sew sleeves into armholes
This tutorial shows how to properly sew a sleeve into an armhole.
We pay special attention to control measurements on the bodice after
Sleeve stitching.
Lesson 29. WTO sleeve armholes
In this lesson you will learn how to properly iron armholes after
Stitching sleeves and how to place sleeve seam allowances in finished
Products.
Lesson 30. Cut out the cuffs and reinforce with doublerin
In this tutorial you will learn how to cut sleeve cuffs without fastening.
Find out what you need to consider to make a cuff without fastening comfortable
When putting on a dress. Shows how to strengthen the cuff
Doublerin.
lesson 31. Stitch, iron the cuff and connect it to the sleeve
Let's figure out how to sew a cuff, how to assemble the bottom of the sleeve and
How to pin (baste) a cuff to a gathered sleeve, what to do
You should pay attention.
Lesson 32. Sew the cuff to the sleeve
From this lesson you will learn how to properly sew a cuff to a sleeve
With gathering at the bottom. Learn how to trim seam allowances correctly
Gathered at the bottom of the sleeve and why it is important. Find out the way
Processing the inner cut of the sleeve cuff with a hidden seam.
lesson 33. Align the bottom of a dress cut using bias threads
This lesson goes into detail about why it's important to let your skirt hang.
Quarter-sun cut dresses. Let's look at a simple method
Aligning the bottom of the dress.
Lesson 34. Process (hem) the bottom of the dress
Let's look at how to process the bottom of a dress cut on the bias.
We perform processing with a narrow seam.
Lesson 35. Demonstration of the finished result on a figure
lesson 36. How to measure a pregnant figure for cutting under
busty dresses
In this tutorial you will learn how to measure a pregnant woman's figure for...
Sewing a dress that is cut under the bust. Very important things to understand
Points that will need to be taken into account when creating a pattern and
Modeling.
Lesson 37. How to reflect measurements from a pregnant figure on a drawing
bodice
In this lesson, using a pattern to scale as an example, we show how to add
Adjustments to the construction of the pattern if the pregnant woman’s belly is very
Big .


3. The course is compatible with Windows and MacOS operating systems
When downloading, you will be able to select the course format you need (for operating system Windows or MacOS). No additional programs are required to run the downloaded courses.
For online viewing, all you need is any modern browser. For example - Google Chrome, Firefox, Opera, Edge, Internet Explorer, Yandex Browser.
6. Videos are protected
Each video lesson of the course is protected by the InfoProtector system.
After payment, you will receive a course activation key and access to a special account where you can watch the course.

Frequently Asked Questions
Answer: All topics in the video courses are covered thoroughly and in great detail, so anyone who wants to learn how to sew, regardless of gender and age, can master cutting and sewing using our video courses.
To successfully complete the course, you will need some basic skills in operating a sewing machine. You need to at least know how to thread a sewing machine and know how to make a straight stitch. It doesn't hurt to know the functions your sewing machine can perform.
If you’ve never even seen a sewing machine, then it’s too early to master a dress-making course.
As for the cut, please keep in mind that in this video course we are talking about modeling dresses cut off under the bust on the basic basis of the dress.
The construction of the basic basis of the dress, on the basis of which the modeling of the cut-off dress under the bust is performed, is not contained in this video course. The basic basis of a dress is a very broad topic. We analyze it in another video course from the ARMALINI sewing school. The video course is called “The Formula for the Perfect Dress”, you can find out more about it on the website of the ARMALINI sewing school in the “video courses” section (https://site/)
Will I be able to sew a good quality dress if I have a very non-standard one? complex figure and low (high) height?

Answer: Yes!
Armalini cut allows you to create the perfect pattern for absolutely any figure. This is quite possible if you take into account all individual characteristics (height, volume, figure contour) even at the stage of taking measurements.
This is what we do. We teach this in the video course “Formula for the Perfect Dress.” The video course “Formula for the Perfect Dress” is not included in the content of the video course “Cut-to-the-bust dress”.
The video course “Cut-out dress under the bust” contains many modeling options based on the basic basis of the dress (or blouse).
As for sewing technology, you can sew a high-quality dress no matter what your figure is. All sewing techniques are the same for all figures, without exception, and are covered in great detail in the video course “Cut-out dress under the bust.”
I don’t understand how you can learn to sew on the Internet? This is impossible!
Answer: It's very possible! And even better than some in-person cutting and sewing courses!
The information in the video courses of the ARMALINI sewing school has not only been worked out on many customers with different figures, but also polished in face-to-face classes, which have already been attended by many hundreds of students.
Our teacher has extensive experience in presenting information to students, so she knows how to make learning interesting, not boring and effective.
In addition, when studying on your own, you yourself determine the time of classes and their duration. You can exercise at the intensity that suits you, at any time of the day. And you can review a particular topic many times if necessary, which is practically impossible in face-to-face courses, where the topic is taught once, or maximum twice.
If you have any questions or difficulties, you can always ask the teacher a question via feedback.
Answer: There are many differences. Let's name only the most basic ones.
The main difference is QUALITY. First of all, the quality and uniqueness of the pattern-making material that is given in the courses. The quality of filming and the quality of explanation of topics and lessons.
And it just seems that all the courses are the same and everywhere they teach you how to cut and sew in the same way and well. In reality, everything turns out to be far from the case.
Often they won’t teach you how to cut well, they’ll teach you how to sew a little and that’s all. And it turns out that not only money is wasted, but also precious time. But there was still no result...
In our courses the opposite is true. You get the result immediately and forever. Because you simply won’t want to cut and sew any other way.
These are the only video courses on the Russian-language Internet that provide unique, interesting information and you get EXCELLENT results immediately.
Answer: Sewing well and sewing well are two different things. Many of our students also thought they were good at sewing until they got acquainted with our courses.
After they began to cut and sew according to the Armalini cut, their opinion about their previous works changed greatly. The realization came that their skills were far from good. And they began to sew well only now, after classes with us.
Therefore, even if you already know how to sew, then improve your skill level and learn unique way the cut won't hurt anyone.
Answer: The video course “Cut-out dress under the bust” contains many modeling options based on the basic basis of the dress (or blouse).
The construction of the basic basis of the dress, on the basis of which the modeling of the cut-off dress under the bust is performed, is not contained in this video course.
The basic basis of a dress is a very broad topic. We analyze it in another video course from the ARMALINI sewing school. The video course is called “The Formula for the Perfect Dress”, you can find out more about it on the website of the ARMALINI sewing school in the “video courses” section (https://site/)
Answer: We agree, there are really a lot of different free master classes on the Internet, there are many articles on different sites and hundreds of videos on YouTube. Why then buy video courses from us?
There are three reasons:
1. When there is no system, when all the materials are scattered and not connected with each other, it is very difficult to get an overall picture in your head and develop a clear action plan.
In addition, most of the materials on cutting and sewing that you will find are written by theorists who once learned to sew somewhere, but have no real experience working with different shapes. And it’s even worse if you come across a MK from a craftswoman who herself recently sat down at a sewing machine, and there are plenty of them.
In our video courses, you will find a clear sequence of steps from a real practicing master with extensive experience in individual tailoring. What is important is that these steps bring excellent results, which means they are correct. You only need to repeat these correct steps in relation to your product, your figure and get the same excellent result.
2. By viewing free materials on the Internet, you are deprived of the opportunity to ask questions to the author and receive feedback from him. You cannot discuss this or that point in pattern construction or sewing. In our course, you can always ask any question you have to Lina Vladimirovna Frolova and receive a detailed answer from her. This is very valuable and important.
3. Our brain is designed in such a way that free information is not valued at all and does not motivate us to act.
When we deal with free things, thoughts constantly creep into our heads
“I won’t be able to do this”, “It’s probably difficult and I won’t be able to”.
But if we invested the money we earned through our own labor into training, then the approach changes to the opposite. We begin to appreciate the material and really implement what we have learned!
Answer: Yes, you can easily use the basic foundation that is given in the video course “Classical Women’s Blouse”.
Both the courses on dresses and the course on blouses teach you how to create an ideal pattern, on the basis of which you can model and sew dresses that cut under the bust.
An impeccable result will be achieved both on the base of the dress and on the base of the blouse.
And the sewing technology in the video course “Setting dress under the bust” is the same for everyone.
Sewing a cut-away dress under the bust is shown in detail and is understandable to all students at any level of training.
The opportunity to sew chic dresses for yourself and your loved ones with an excellent fit on a minimal budget.

After studying the course, you will no longer need to go shopping in search of a suitable dress model at an affordable price.
You will be independent of the assortment in stores and the clearly inflated prices of different dresses.
You will be able to significantly save your budget, because you will sew the products yourself. This dress will fit you perfectly!
You will be able to copy famous brands, while spending only on fabric and a sewing stock. Savings can amount to thousands, and in some cases tens of thousands of rubles!
The opportunity to sew for customers and make money from it.
Let's look at two options for dresses with underbust undercuts.
In the first version, the dress is cut along the waistline with folds under the bust.
In the second, it is continuous at the waistline with gathering under the bust.
You remember that our example is one of many possible options. You proceed from your desires and plans.
First option. Dress with a cut under the bust and a seam at the waistline.
If you have not yet created a pattern for the base of the dress, we recommend using our
Let's copy the upper part of the shelf from the drawing of the dress base pattern onto a sheet of paper.


If you are planning to sew a dress cutting along the waistline, the dart on the bottom of the bodice needs to be closed.
To do this, first connect points T10 and T11 with point G7.

We cut the chest dart and close the dart at the waist line, combining straight lines G7T10 and G7T11 (see Fig. 5).

Determine the location of the undercut.
Divide the distance from the armhole to the waist into three equal parts. We denote the lower division point with the letter D. In the center of the front from the chest line (G3), we put 4 cm down and place a point D1. We connect points D and D1 with a smooth curve. We get the cutting line.

The location of points D and D1 may be different at your discretion. Therefore, the cutting line will have a different configuration.
We design the waist line with a smooth line.

Cut the bodice along the hem line.

Set the bottom part aside. And in the upper part of the bodice we close the chest dart, thereby opening the dart to the hem.

We shorten it by shifting the top of the dart 3 - 4 cm from the center.
